I have even taken photos of us sewing some pillowcases... so I can tell and show at the same time!!
Enjoy!
DESIGNER Hot Dog PILLOWCASE
The “roll-sew-pull” method of construction, which dramatically reveals a perfect finished edge, is the MAGIC in this project.
*******************************************
STEP 1Cut your fabric into the following sizes.
Piece A = pillow case cuff, should be 9” x 42”.
Piece B = pillow case trim, should be 2 ½ ” x 42”
Piece C = pillow case body, should be 27” x 42” (or 37” x 42 for a king size)
*******************************************
STEP 2Take piece B to the ironing board and iron it, press wrong sides together, lengthwise. It should now be 1 ¼ ” x 42”.
Place piece A, right side up, on the table. This is the HOT DOG BUN.
Place piece B on top of piece A, matching the top raw edges.
Place piece C, right side down, matching top raw edges with piece A and piece B. PIN them together.
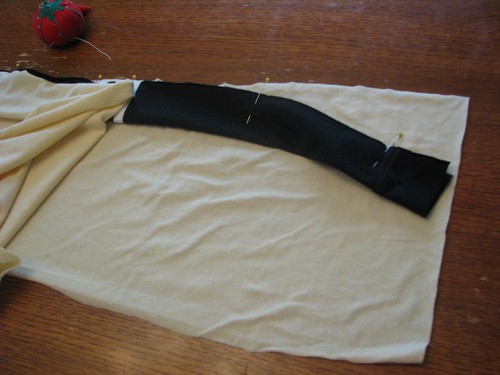
Roll piece C toward the top, until you see about 1/3 of piece A. (The right side of the material will be facing you). This is the HOT DOG.

HINT: don't poke your finger with a pin -- cause it hurts!
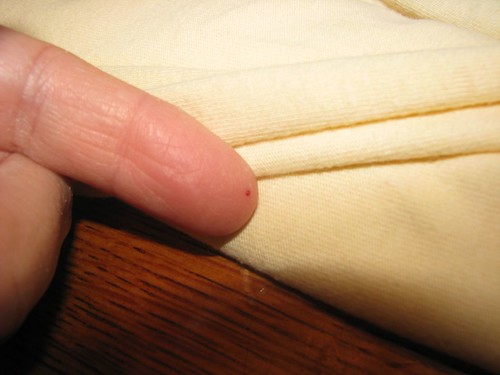
Bring the bottom 1/3 of the piece A and match it to the raw edges. You now have 5 raw edges matched and should pin them. (The wrong side of piece A will now be facing up. )
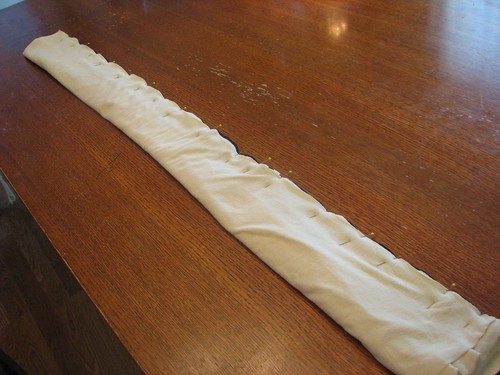
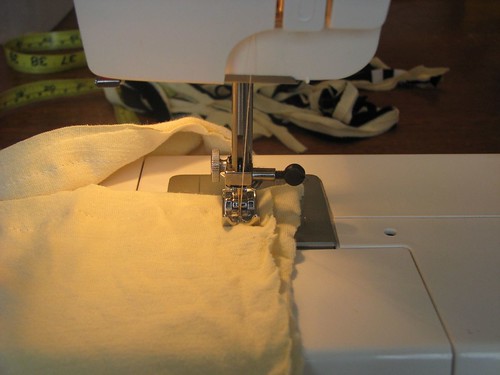
Stitch a seam, sewing along the pinned edges, backstitching at both ends. Pull the pins out as you sew, before you sew over them, to avoid breaking a needle. Take care not to sew the pillowcase roll into the seam. Seams may be trimmed after sewing.
*******************************************
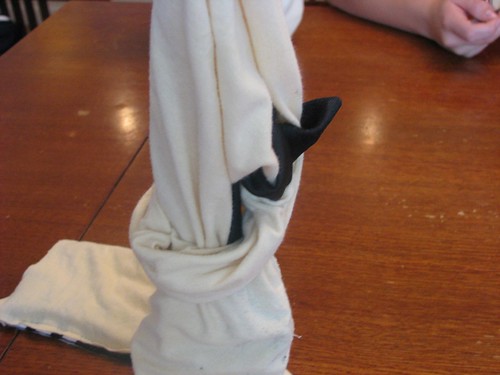
STEP 3Reach into the sewn tube and pull out piece C. This is magic of the HOT DOG method!
Press to make your edges crisp, beginning on the wrong side. Pressing is an important part of sewing to shape and set the stitches. Press after stitching each seam. You will be able to stitch the next step smoothly and evenly, and your article will have a more professional look..
Trim off selvage edge and even up the long edges. (Selvage edges can shrink and cause your pillow case to pucker).
*******************************************
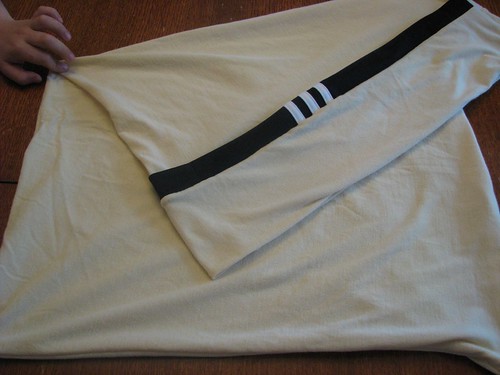
STEP 4With the WRONG SIDE together, fold the pillow case in half matching the long raw edges.
You will sew the edges with a French Seam. Beginning at the TOP of the pillow case, stitch a 5/8” seam. A French seam is stronger and has a more clean look, preventing fraying. Leave your needle in the fabric at the corner, lift your presser foot and turn material, lower presser foot and keep on sewing along the bottom -- makes a nice corner.
Trim the seam to 1/8”.
Turn the pillowcase to right sides together and press again along the edge of fold.
Beginning at TOP of pillowcase, stitch 5/8” from fold.
Turn the corner and sew the bottom edge seam with a 5/8” seam allowance.
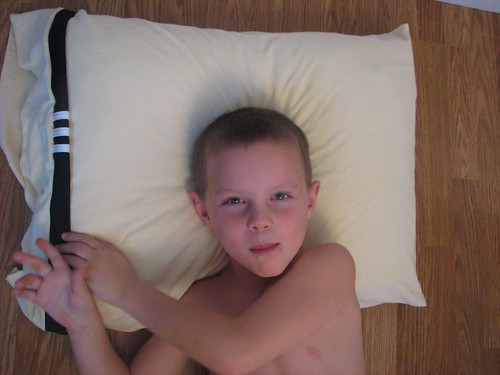
Turn, right side out again. Press the seam and give the pillowcase a final press.
Repeat until you are all done with your Christmas Sewing!!
My folks have arrived. Hooray -- the Grandparents are In the Building!!! While the men are at home playing with fire -- more about that later -- the girls and I are headed to the fabric store to buy some goodies today. We will be making these today. If you make some -- I wish you'd share some pics with me! I'd love to see them.
I've put a button at the bottom of the post which you can use to get a printer friendly PDF of this post. This is my most looked at post by far. I pray you enjoy making your pillow cases! °Ü°


I was wanting to watch this process but had to put my kids to bed. Thanks for posting!!
ReplyDeleteI am in the process (for over a year now, but almost done!) of making a quilt for our room. I think I might do these too. Great idea!
Thank you for a great explanation of the how to do the hot dog pillowcase. I was having difficulties with the trim. I thought the trim would be on the cuff not the pillowcase body. I see now that doing it the hot dog way that the trim will lay on pillowcase body.
ReplyDeleteThanks for the pictures, I was having trouble understanding how the trim would lay down.
ReplyDeletelove your instructions! i am so glad you posted them. I was lacking measurements. I was recently on a cruise with several other quilters, and they showed me this little masterpiece. Since my niece is getting married in march, i can now make pillow cases to match the quilt that i am making her! Thanks again!
ReplyDeleteBabs
Great directions except for one thing. Please review your French seam instructions. The initial, wrong sides together, seam shouldn't be more than 1/4 inch. After trimming, pressing & folding with the right sides together, sew in a 3/8-inch seam. Do the math--if you use 5/8-inch seams for each seam, you're using up 1 1/4 inches. If you decide to make a gament with French seams, following your instructions would result in a fitting disaster. I don't mean to be rude, but I do tend to be too direct sometimes. I have used French seams on numerous items & like it for sheer fabrics in particular. BTW, I'm a Certified Master Volunteer in Clothing Construction (whew) in Kentucky. Alice
ReplyDeleteHey Alice - did you make these yet? When I made them it worked.
DeleteAlice, what is a gament? Did you mean garment?
DeleteI am teaching my girls to sew and this is a project that is beautiful when done, the self satisfaction of a job well done is what keeps them coming back--thank you from the bottom of my heart ---judi
ReplyDeleteHi there!
ReplyDeleteI loved your pattern and easy to follow instructions! Have to admit that 1/4" seam allowance for french seam & then 5/8" seam worked really well. I think I'll be making a pile of these! Thanks again.
Mary
This comment has been removed by a blog administrator.
ReplyDeleteAre you the original person to make up the "hot dog" method? When I make these pillowcases I would like to give credit to the originator of this method.
ReplyDeleteAbsolutely not! :) I got these instructions on a piece of paper from church after making them with ladies from my church. I am not creative or original.
DeleteJust finished making this for the Million Pillowcase project - these were the first VERY clear instructions I found, and I found a LOT (not so clear!). Thank you for sharing them with us all!!
ReplyDelete